Showing posts with label diy. Show all posts

7.26.2011

{ DIY } curly locks

ever since my hair's gotten long enough for me to wear curly, i've been getting a ton of questions about how exactly i achieve those spiraled tresses. to follow is my not-so-secret strategy.

it's worth first noting that, if left alone to its own natural devices, my hair looks like this:

before curling it, i begin by pinning the top half up. i divide the pinned parts into three chunks: left, right and back (each of which will be attended to individually). i use CLIPS SIMILAR TO THESE:

using THIS CURLING IRON, i begin curling the left side. i always leave the tips of my hair outside the curling iron's clamp (in other words, i start the curl about 1" in on each length of hair). always curl towards the back of the head:

i do the right side the same way, always curling toward center back:

next, i let down the clip holding the top layer of hair on my left side. i curl it in small sections, still rolling each toward the back:

then, i let down the back clip and curl that section. things can get a little awkward here, but practice makes perfect:

at this point, i use my fingers to brush out / muss up what's already curled, then apply a generous mist of hairspray (just about any brand will do):

finally, i do the right / front section. here especially, make sure to remove the curling iron in the direction of each curl. it helps set the shape as the heat is slowly released:

another rigorous finger-combing, another coat of hairspray...

...and i'm done!!

7.10.2011

{ DIY decor } why don't you...


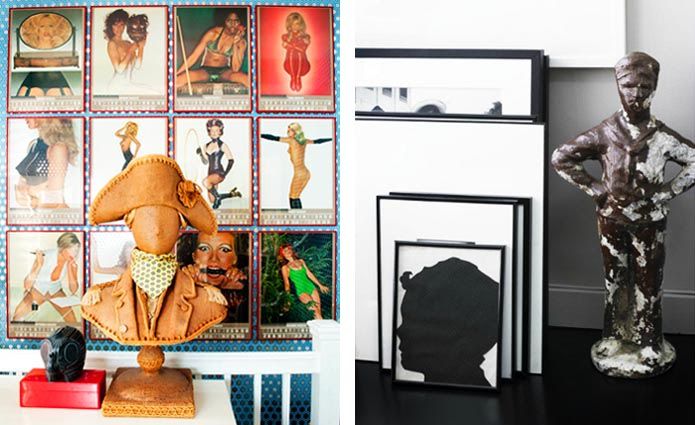
{ above left: cut-up and frame the pages of a cool old calender // above right: make your own silhouette portraits }

{ above left: apply spray adhesive and then sand (or glitter!) to a junk-shop-bought hunting trophy // above right: use horns (or branches!) to store your everyday jewelry }
---
images 1, 3 and 4 via the coveteur // image two via desire to inspire

6.29.2011

{ glamourai DIY } floral headdress

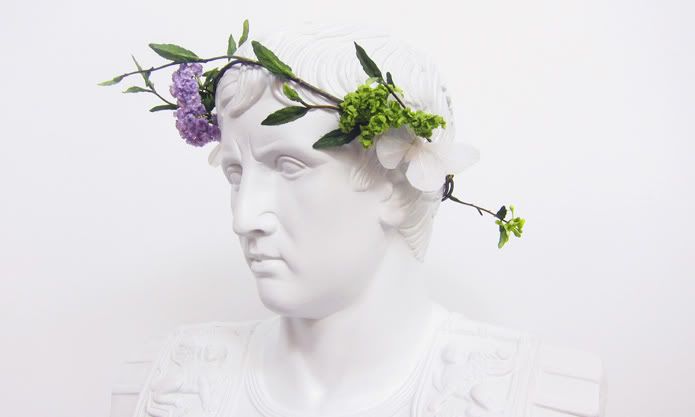
many of you really liked the floral crowns i wore in my first and second midsummer posts ~ so i'm excited to show you just how easy it is to make your own!

first, a note: i used fake flower branches for my crowns (mine came from assorted stores in new york's floral district, which is located on 28th street between 6th and 7th avenues), so they could be worn again and again. if you're okay with a more ephemeral effect, then the same steps can be followed with real flowers.

the materials i used were:
- faux floral branches (i chose relatively sparse stems for a natural feel, but you could easily go more dramatic and pick fuller pieces to work with):

- extra decorations (for my first crown, i added vintage silk geraniums that i found at tinsel trading. for this second round, i used little white feather butterflies that i picked up in the floral district):

- needle nose pliers, wire cutters, jewelry wire and clear nail polish:

STEP 1: choose two branches and secure them together, end-to-end. do so by cutting a short piece of jewelry wire and wrapping it tightly around the ends of both branches with your needle nose pliers.


STEP 2: make a second connection so that your two branches now form a full circle. before securing this time, make sure the circle fits around the top of your head!

STEP 3: now that you have the base of your crown built, you can begin layering on more frills and frippery ~ as much or as little as you please! cut smallish sprigs off your faux floral branches, then connect them (individually) to the crown using more little bits of wire, as shown below:


STEP 4: once you've filled the crown with flowers, add in whatever additional bits and bobs you'd like. i chose the white butterflies to better coordinate my crown with my theyskens theory dress. these came with clear threads attached to their backs, so i didn't need jewelry wire to attach them. instead, i just tied a very tight knot, which i then double-secured with a dollop of clear nail polish:


STEP 5: once the polish dried, i snipped off the excess thread. and... that's it!!

remember that the possibilities with this project are essentially endless. use these basic steps on any kinds and combinations of floral lovelies! and if you decide to make one of these babies yourself, please share the pics on my facebook page. happy crafting!!

---
PS: click HERE for brand new midsummer photos!

6.23.2011

{ ideas } for DIY

in between bonkers bouts of work, i've been (slowly but surely) continuing the studio redecoration i mentioned last month. the whole thing's got me in quite a crafty mood! here are a few DIY ideas i'm especially loving:

{ vintage charms stitched and pinned onto any old leather jacket }

{ wads of taper candles crammed into an oversize vase }

{ floral painted pockets }

{ super-useful wall art }

{ everything's better on wheels! }

2.19.2011

{ just do it } yourself


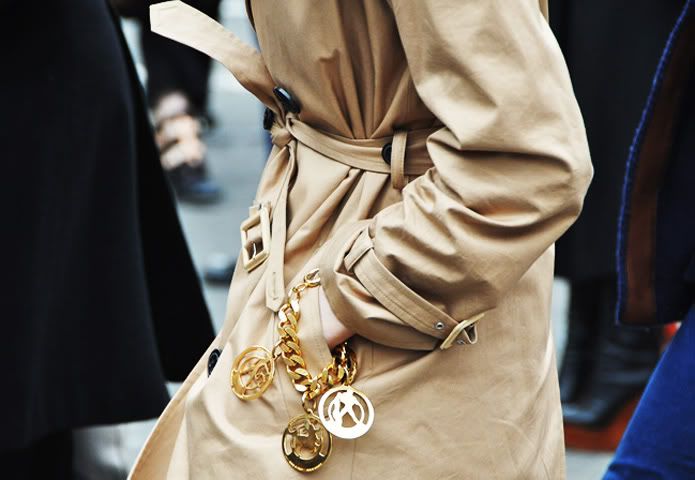
i realize her bracelet is separate from the jacket, but is anyone else thinking what i'm thinking: that it's totally time to DIY CHARM-BRACELET-EMBELLISH the pockets on a vintage trench?? or maybe i've just got chain-spiration stuck on my mind?!
{ image via style.com }

2.18.2011

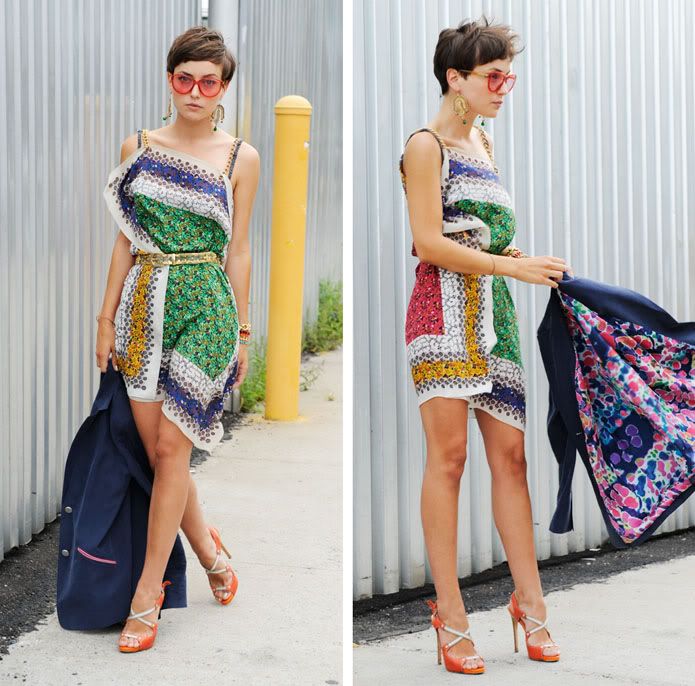
{ a second chance } to scarf-tan-ette

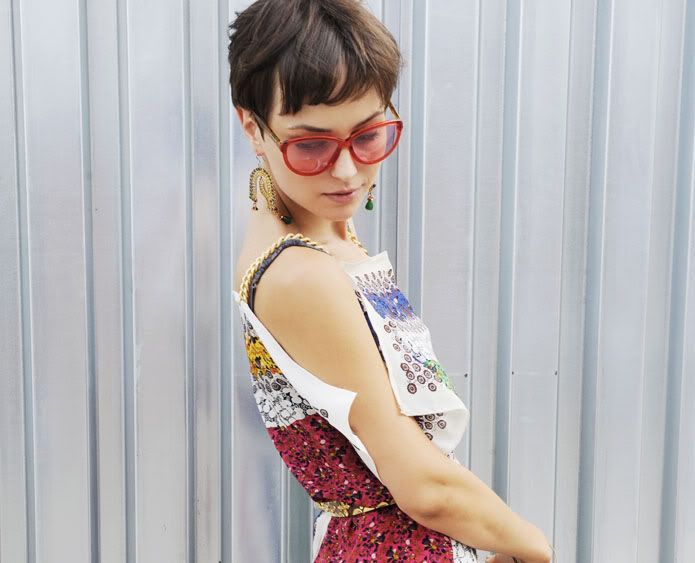
remember back in july, when i did a makeover of the forever21 dress below (replacing its original suede straps with shiny gold chain)?!?


if so, you may recall that before i was able to post about the project, the piece had sold out ~ so i followed up with a DIY version of it instead. well, thanks to the helpful tip-offs of several eagle-eyed readers, i'm happy to tell you that the original dress has recently been restocked online. this means you can finally buy it yourself and do your own easy-peasy chain-strap update!

of course, if you'd prefer to spend the day getting crafty, the DO-IT-YOURSELF PROJECT this dress inspired is surprisingly fun and easy to execute ~ and the full instructions are HERE. either way, enjoy!!

12.10.2010

{ before + after } bedroom furniture

i've always been a compulsive improver, a serious DIY addict. i can't look at anything without thinking how i can make it better! this trait came in handy while decorating the apartment (on a budget!), as so many things can be transformed with a little patience and a few swathes of paint. here are two of my favorite makeovers:

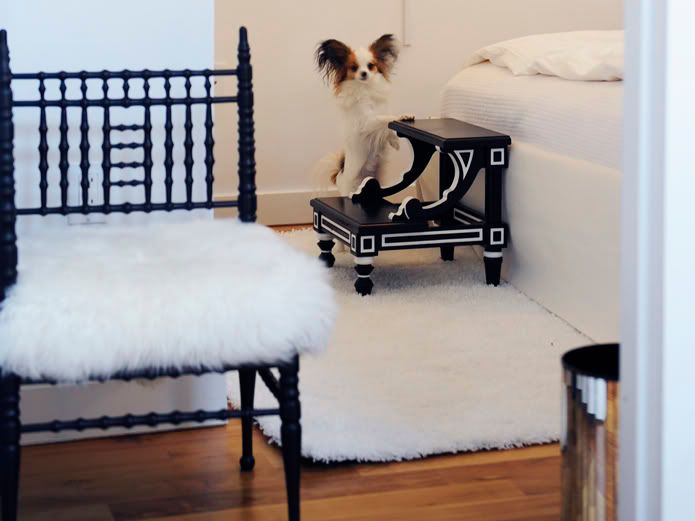
this bedside stool was a surprise score. i'd been looking for a chic step stool for a while, but they are surprisingly hard to come by. when my guy texted a photo of this one to me (from a yard sale in the hamptons), i knew it had incredible potential. only problem was, the seller didn't want to let it go without the matching (ginormous) bed frame. i insisted that he be persistent, threatening: "don't you dare come home without it!!" in the end, it took four trips to the woman's house over the course of two days, plus a whopping $30 to wear her down. the day he returned home victorious, i set to work painting our prize!

as you may have gathered from this photo, it serves a vital function to my pampered pup. while i'll be the first to admit that pooch is spoiled rotten, installing steps for her to get into bed was more about my convenience than hers ~ i hated being woken up every time she got the urge to cuddle! i also use it as a perch while putting on shoes, and as a way to reach the purses at the tippy-top of my closet.

this dresser came from craigslist. it was pretty banged up (as you can see) ~ but it was cheap, and its architecture (especially the quietly curved lines) reminded me slightly of the step stool above. i really liked that it had lots of little drawers on top to store my sunnies and accessories. luckily, a bit of wood glue (for that taped-together leg), some sanding, and a couple coats of paint went a long way; this project took only a day!
---
i hope this inspires you to look at that next yard sale find with a more open mind ~ or even to rethink something already in your own home!!
10.22.2010

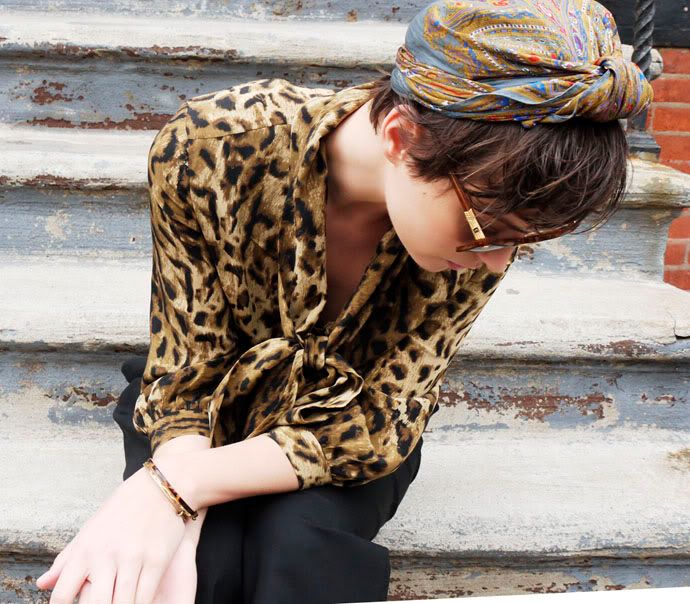
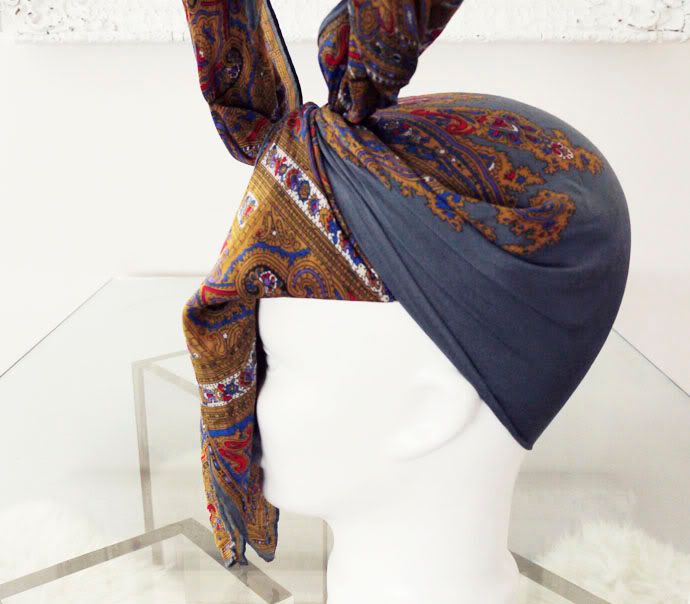
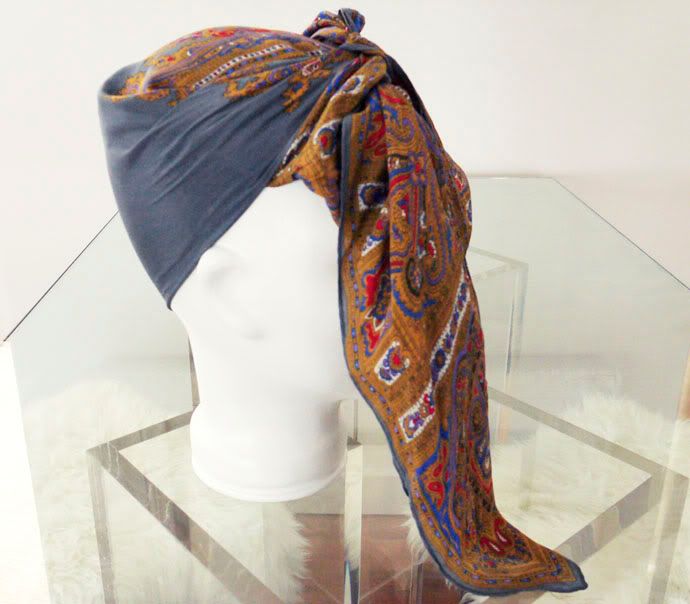
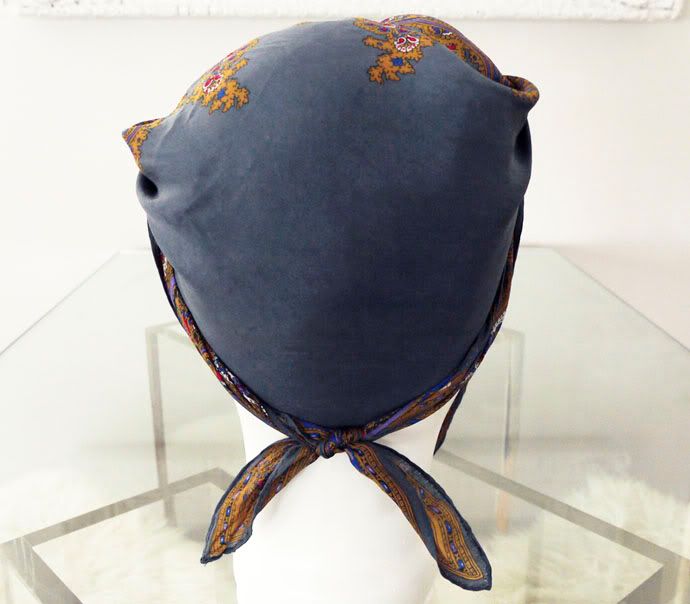
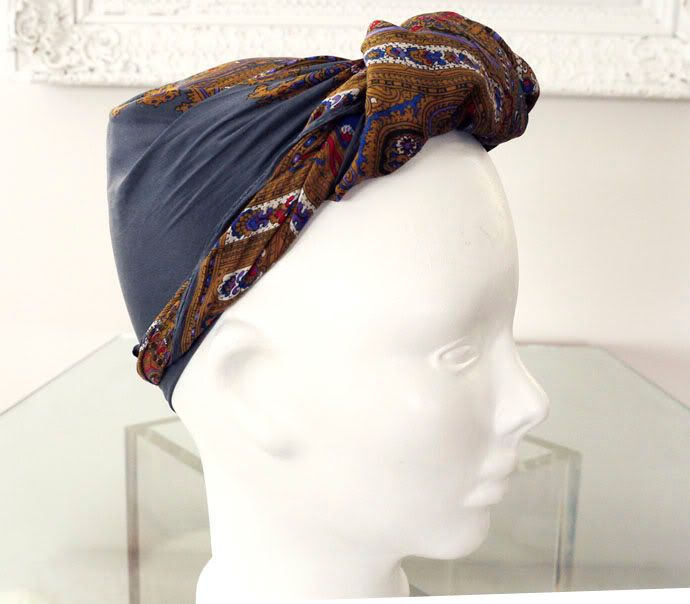
{ how to } tie your own turban

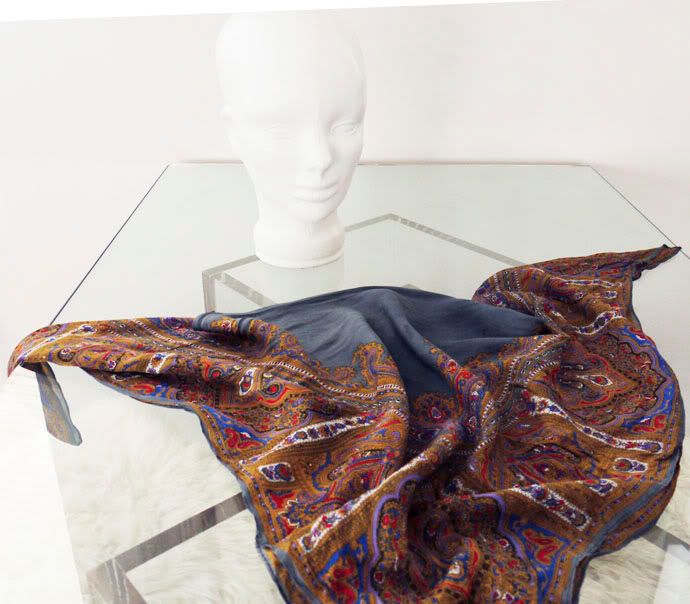
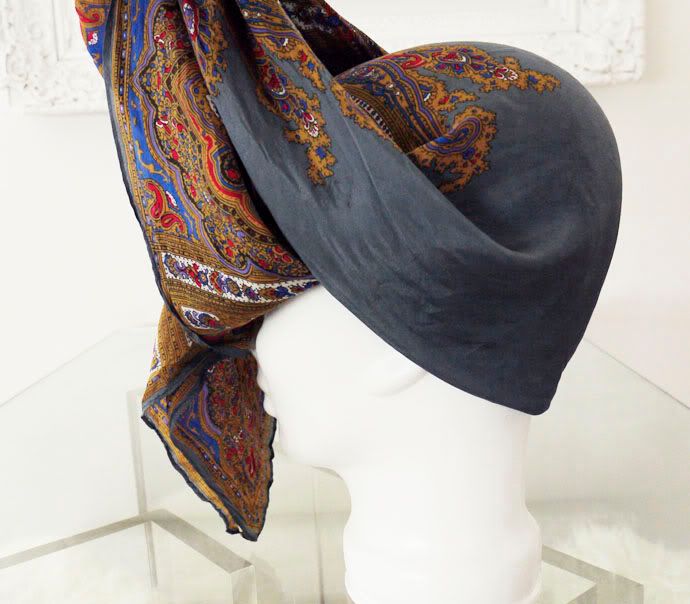
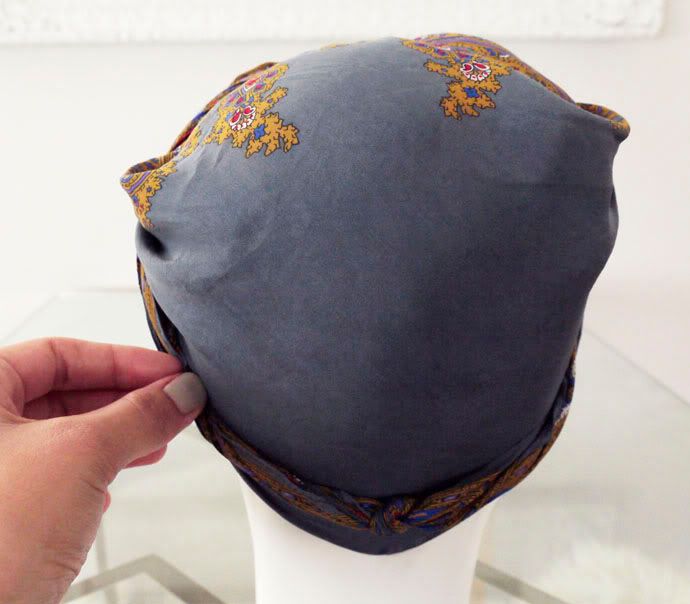
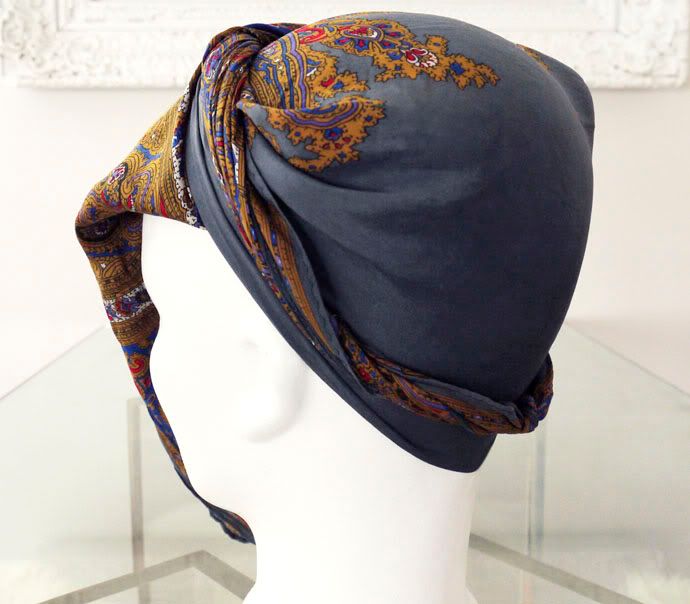
you all know that i'm trying to grow my hair out, and have been brainstorming creative ways to hide its awkward in-between stages. enter the faux-turban! this fun headwrap works with almost any haircut ~ and luckily, all you need is a lightweight, vintage silk scarf (30" square is ideal) and a little ingenuity to pull the look off!!
{ outfit above originally posted in full yesterday }
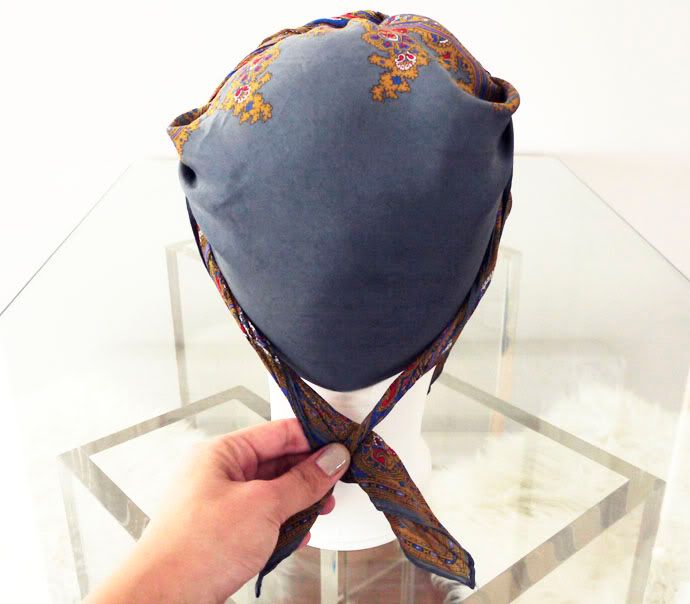
begin by folding your square-shaped scarf on the diagonal, like so:

center the long, folded side of the scarf at the nape of your neck...

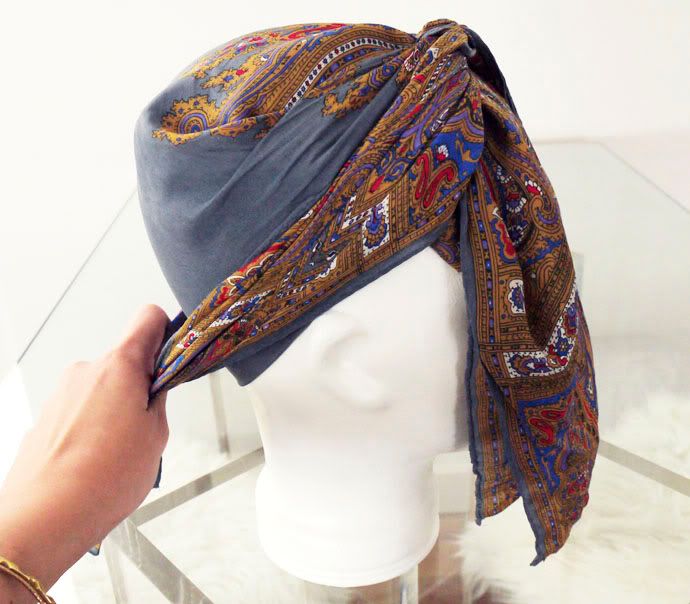
...and pull the left & right-side pieces up to the top of your head. then, knot them once...

...like so:

next, pull the same pieces you just knotted around to the back again:

and tie them into a double-knot:


tuck the tail-ends of that knot under the side pieces:

finally, grab the piece hanging out in front and pull it up and under, tucking the tip of it into that first knot you made at the top of your head...

...and voila!! the result is a little bit rockabilly, a bit boho ~ and totally easy to execute (seriously, it takes about 4 seconds from start to finish). so have fun with it, let me know in the comments if you have any questions, and please post photos to my facebook page if you decide to work the look yourself!
-----
{ PS: for more inspiration on how to wear it, i've rocked the look HERE, HERE, and HERE! }
~ like the idea? then be sure to check out my other scarf-centric DIY project!!

9.21.2010

{ glamourai DIY } instantly stately


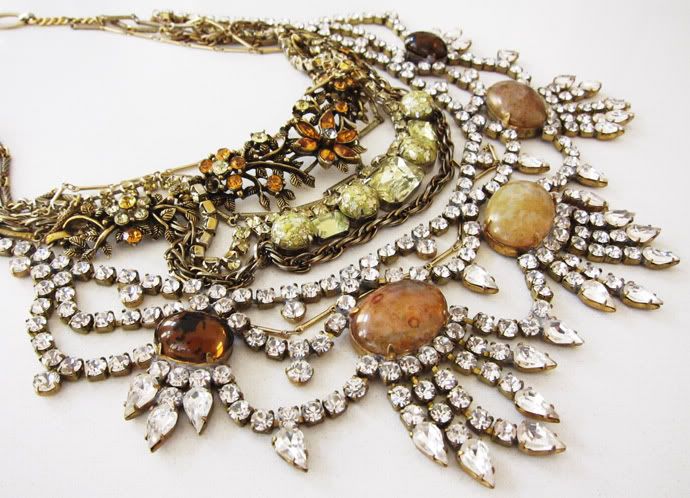
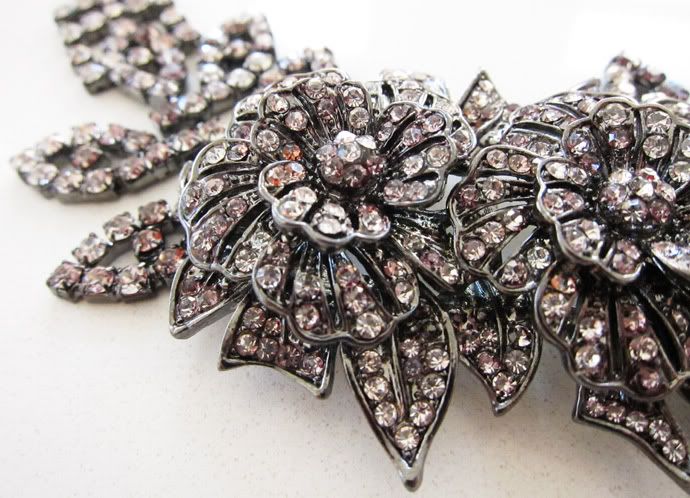
{ above: reworked antique/estate jewels from my private collection }

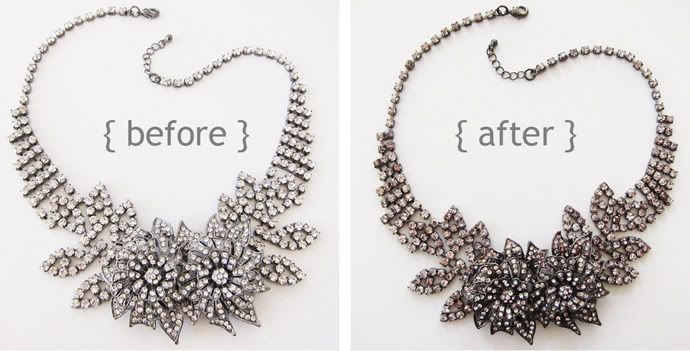
i love the look of estate jewelry, especially articulated rhinestone pieces that have developed a smokey patina over time (like the yummy stuff above!). unfortunately, such gems can be either hard to find or stunningly expensive. on the other hand, modern replicas may be more affordable, but they often lack a certain depth ~ to my mind, new, too-shiny jewels always look cheap. good thing i've got a trick for faking the estate look!

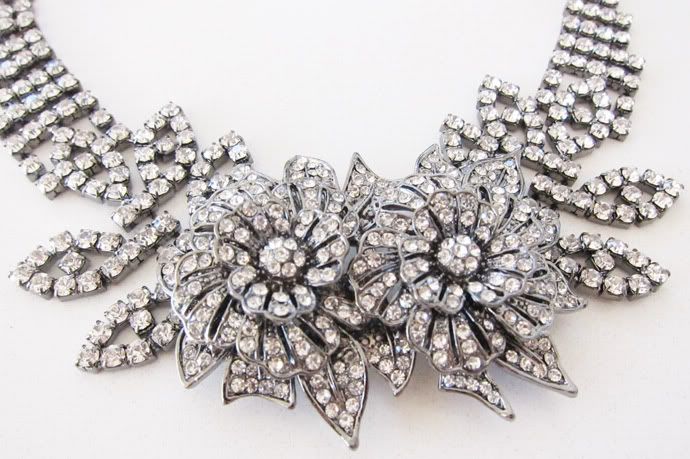
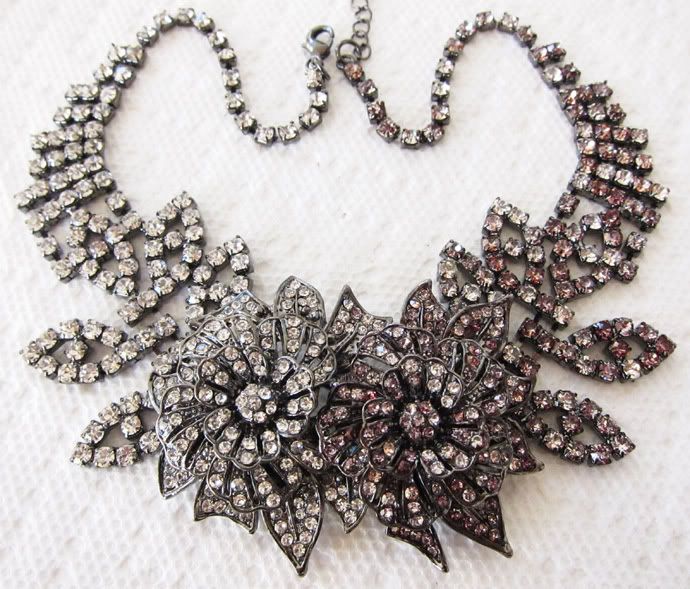
here's what you do: start with a rhinestone necklace (or earrings, bracelet, etc...). recently, i fell in love with this 3D floral stunner while culling pieces for my f21 store. although it's undoubtedly a pretty piece as is, i imagined it might be a bit too glitzy ~ even for my taste! however, i knew it would be perfect for this project.

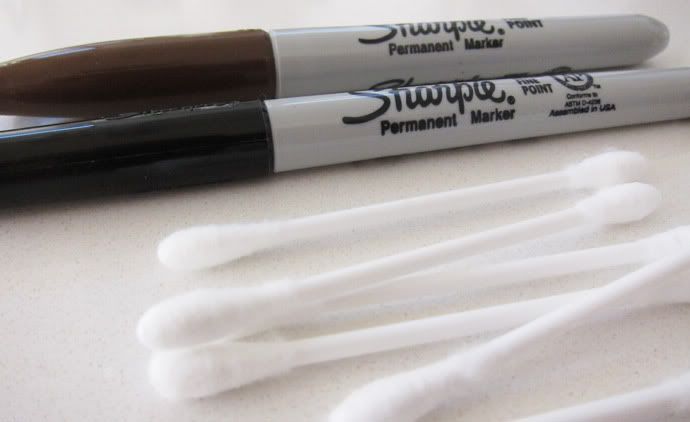
other than that, you'll need:
- paper towels to protect your work surface
- a black AND a brown sharpie pen (fine point is preferred)
- a handful of Q-tips
- nail polish remover (optional)

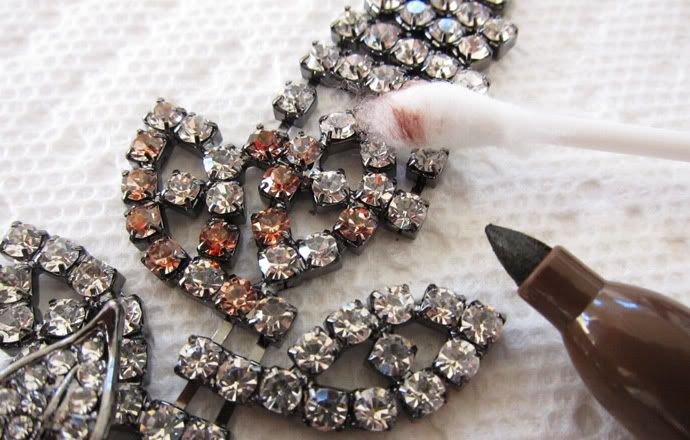
first and foremost, cover your workspace with paper towels; permanent marker does NOT come off tabletops! next, start smudging brown sharpie over the stones; to get that naturally aged look, occasionally skip a stone or two. you want it to look a bit random (as organic aging tends to be). blot the ink up with a moistened Q-tip (dipped in water!) as you go:

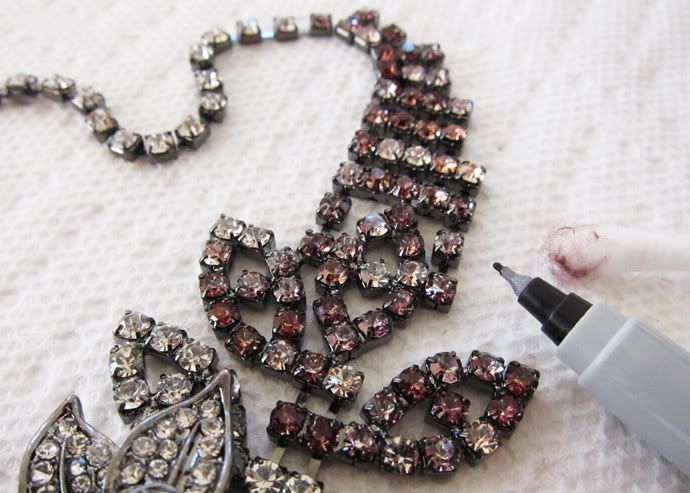
next, trace back over the stones with the black sharpie (continuing to blot with damp Q-tips as you move along). layering black over the brown adds dimension, making the stones look more naturally smokey:

for the sake of this tutorial, i completed the right side first, so that you'd be able to compare the desired finish with the original starting place (ie, the left side):

after continuing the same work on said left side, i realized i'd gone a bit too dark overall. that's easy to do ~ but just as easy to fix! simply dip one of your Q-tips in a bit of nail polish remover, and sweep it over the top surface of the stones. use a light touch on this step ~ that will help bring the shine back to the tips of the piece, while maintaining the shading around the sides of the stones. and voila! that's all it takes:

see the difference?! this transformation is definitely (intentionally) subtle; because, as we all know, chic is in the details!

let me know in the comments if you have any questions, and send me pictures if you decide to test this out for yourself!! as always, please keep in mind that you don't have to buy anything new to do this project ~ just dig around in your jewelry box for anything a bit too blingy and try giving it the antique treatment!