
many of you really liked the floral crowns i wore in my first and second midsummer posts ~ so i'm excited to show you just how easy it is to make your own!
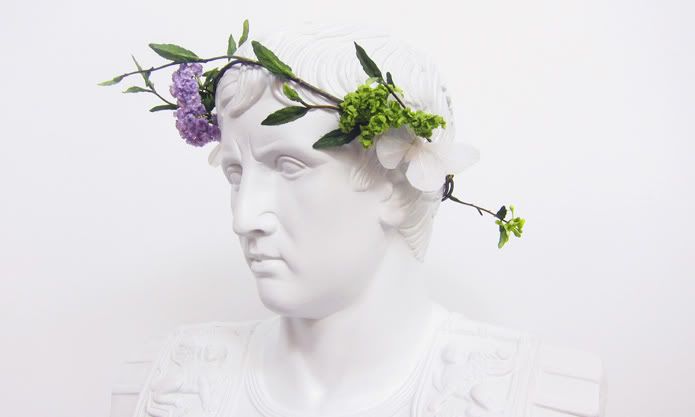
first, a note: i used fake flower branches for my crowns (mine came from assorted stores in new york's floral district, which is located on 28th street between 6th and 7th avenues), so they could be worn again and again. if you're okay with a more ephemeral effect, then the same steps can be followed with real flowers.
the materials i used were:
- faux floral branches (i chose relatively sparse stems for a natural feel, but you could easily go more dramatic and pick fuller pieces to work with):

- extra decorations (for my first crown, i added vintage silk geraniums that i found at tinsel trading. for this second round, i used little white feather butterflies that i picked up in the floral district):

- needle nose pliers, wire cutters, jewelry wire and clear nail polish:

STEP 1: choose two branches and secure them together, end-to-end. do so by cutting a short piece of jewelry wire and wrapping it tightly around the ends of both branches with your needle nose pliers.


STEP 2: make a second connection so that your two branches now form a full circle. before securing this time, make sure the circle fits around the top of your head!

STEP 3: now that you have the base of your crown built, you can begin layering on more frills and frippery ~ as much or as little as you please! cut smallish sprigs off your faux floral branches, then connect them (individually) to the crown using more little bits of wire, as shown below:


STEP 4: once you've filled the crown with flowers, add in whatever additional bits and bobs you'd like. i chose the white butterflies to better coordinate my crown with my theyskens theory dress. these came with clear threads attached to their backs, so i didn't need jewelry wire to attach them. instead, i just tied a very tight knot, which i then double-secured with a dollop of clear nail polish:


STEP 5: once the polish dried, i snipped off the excess thread. and... that's it!!


remember that the possibilities with this project are essentially endless. use these basic steps on any kinds and combinations of floral lovelies! and if you decide to make one of these babies yourself, please share the pics on my facebook page. happy crafting!!
---
PS: click HERE for brand new midsummer photos!
first, a note: i used fake flower branches for my crowns (mine came from assorted stores in new york's floral district, which is located on 28th street between 6th and 7th avenues), so they could be worn again and again. if you're okay with a more ephemeral effect, then the same steps can be followed with real flowers.
the materials i used were:
- faux floral branches (i chose relatively sparse stems for a natural feel, but you could easily go more dramatic and pick fuller pieces to work with):
- extra decorations (for my first crown, i added vintage silk geraniums that i found at tinsel trading. for this second round, i used little white feather butterflies that i picked up in the floral district):
- needle nose pliers, wire cutters, jewelry wire and clear nail polish:
STEP 1: choose two branches and secure them together, end-to-end. do so by cutting a short piece of jewelry wire and wrapping it tightly around the ends of both branches with your needle nose pliers.
STEP 2: make a second connection so that your two branches now form a full circle. before securing this time, make sure the circle fits around the top of your head!
STEP 3: now that you have the base of your crown built, you can begin layering on more frills and frippery ~ as much or as little as you please! cut smallish sprigs off your faux floral branches, then connect them (individually) to the crown using more little bits of wire, as shown below:
STEP 4: once you've filled the crown with flowers, add in whatever additional bits and bobs you'd like. i chose the white butterflies to better coordinate my crown with my theyskens theory dress. these came with clear threads attached to their backs, so i didn't need jewelry wire to attach them. instead, i just tied a very tight knot, which i then double-secured with a dollop of clear nail polish:
STEP 5: once the polish dried, i snipped off the excess thread. and... that's it!!
remember that the possibilities with this project are essentially endless. use these basic steps on any kinds and combinations of floral lovelies! and if you decide to make one of these babies yourself, please share the pics on my facebook page. happy crafting!!
---
PS: click HERE for brand new midsummer photos!



36 comments:
Nice idea! I try :)
http://www.purseandco.com
I love how delicate the wreath looks compared with everything that's plastered over the web as of late...I could totally see myself throwing a DIY party/ backyard fete for all my girlfriends inspired by this post!
xo-Julie
Peace. Love. LOL!
Haute Khuuture Blog
This looks like a fun project, you look stunning in these wreaths so I can't wait to give it a try!
You make this look so easy and simple!! Let looked so fabulous on you!! Since it seems quite simple I might have to try!!
www.MrsCapretta.com
Recipes Fashion Marriage
Thank you for sharing how to achieve the "garden goddess" look. Excited to make my own attempt!
♥, Jamie
www.TheFancyTeacup.com
yay! im so happy you shared this diy as i LOVED it
Very pretty and so simple! This has me thinking for halloween :) Thank you!
theartofstylesf.blogspot.com
So pretty!! Will do this when summer comes back :)
Wooooow so nice & pretty ;D
love
FASHION People: WIIL.I.AM model for RYNSHU
http://t.co/HOMNV0F
so Fresh......!
http://monsacbyme.com
lovely, very nice.
kisses xxx
This seems easy enough! I'll try it ! :)
xxx,
Fashion Fractions
love DIYS
this is awesome
http://missmollyfashions.blogspot.com/
Thx, it's cute! ^^
- Ida / couturexx.blogspot.com
amazing :) thanks for sharing!
pinklemonincrystal.blogspot.com
I'm very much into these at the moment, thanks for sharing this DIY, so simple yet so beautiful!x
that's so pretty.
My blog♥mfashionfreak
a few simple steps, and, voila, woodland nymph!
http://dallianceswithsuitsandskirts.blogspot.com/
This is a cute DIY. Would be a really easy and cute Halloween costume too. =)
Celebrity Style and Fashion - Need it? Want it? Crave it?
So pretty! Looks like something you would see in a Free People campaign.
xox Lexi
Glitter & Pearls
so glad you did a DIY for this because i loved the ones you have been rocking but have no idea how it is fabricated. what a fantastic post.
xx, http://wordbyjessie.com/
I like your idea. I looks really pretty on you.
Besos, guapa.
http://porqueelglamourestaenlosdetalles.blogspot.com/
this is so beautiful!
http://yellowbuttonss.blogspot.com/
nice diy, very clever!!
http://ficklesense.blogspot.com/
great choice w/ the sparse branches. it definitely feels natural and simply gorgeous! thanx for the tutorial!
jenny
http://goldnturquoise.blogspot.com/
Great idea
Copper Etiquette Shop Dresses
Beautiful!! I love it for summer parties! Cool blog, I have just discovered it! Kisses!
beautiful DIY... so thorough! THe photos are absolutely stunning!
xxx
www.ladyalamode.com
I love this tutorial!
MY BLOG: DRESS UP FOR ARMAGEDDON
Thank you so much for sharing! I was convinced these were real flowers!
I once did a tutorial on folding square scarves of various sizes! Take a look! http://www.bravoerunway.com/2011/06/viewer-question-folding-square-scarves.html
Such a great idea, and so easy!
http://sparklesmileandshine.blogspot.com/
I love this project. Must attempt asap. Thank you!
Love this! I spent hrs making a midsummer princess costume a few Halloweens ago, and it turned out so beautiful! Unfortunately,I partied to hard that night and ruined my costume, but I still have the crown I made!
cute...DIY stuff are good time occupiers
✘leonie
www.monstrexi.com
Simply to do, amazing to wear!
<3 this.
XO from LittleBlackOrchids
Nice! Thanks for the DIY
Shasie
Please Vote For Me on Fashiolista
Post a Comment